You’ve probably noticed your roof tiles getting a little shabby. Maybe they’re cracking or breaking, or maybe you see water stains on them. If so, then it’s time to think about repairing your tile roof. To get you started on the right path, here’s everything you need to know about tile roof repair. How much they cost, what causes them in the first place and how to possibly tackle them on your own.
Roof tiles are the individual slabs of material that make up the surface of a roof
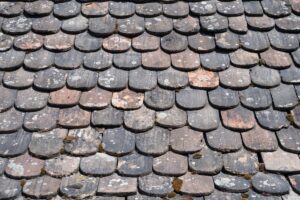
Before knowing about tile roof repair it is important to get familiar with what roof tiles are. Roof tiles are the individual slabs of material that make up the surface of a roof. The roofing tile industry is very large, with about 30 different types of materials used for manufacturing roof tiles. Most commonly, these are made from natural materials. Such as clay and concrete, but can also be made from recycled plastic or glass.
The process for making roofing tiles involves firing at extremely high temperatures to harden them and make them waterproof. So you can use them on your home’s roof. Roofing tiles come in many shapes and sizes. Examples are square or rectangular shapes. Some even have curved corners so they’re easier to fit together when laying out your new flat-roof installation project.
There are two main types of roof tiles
The two main types of roof tiles are concrete, which is made from cement and clay, and clay. Clay roofs are made with natural materials including clay and shale. Concrete tiles are more durable than clay roofs but they’re also more expensive than the latter option.
A lot of people don’t know the difference between concrete and clay tiles. They just assume that all roofing materials are made out of metal. This may be because it’s hard to tell which type you’re getting when buying a new roof. Especially if you don’t know anything about them!
Concrete tile roofs are the most popular type for tile roof repair in the United States
Concrete tile roofs are the most popular type of tile roof in the United States. They’re durable and can last for decades. This makes them a great option for homeowners. Especially if you’re looking for an investment-grade roof that will keep their house in good shape for years to come.
Concrete tile roofs also offer a number of benefits over other types of slate or metal tiles. These include energy efficiency and fireproof properties. If you live in an area prone to wildfires or hurricanes, concrete tile may be the best choice for your needs.
These roofs are also waterproof (which helps prevent mold growth). This makes them perfect if you live in an area with lots of rain or humidity.
Clay tile roofs are made from natural materials
These natural materials include clay and shale, which are fired at extremely high temperatures to produce a durable product. These are more expensive than concrete ones but last longer due to their superior durability. These tiles also weigh less than concrete ones and can be laid with fewer joints in the roofing material itself.
For this reason, clay tiles have become increasingly popular in recent years. Even despite their higher cost for both installation and maintenance work. They’re also more prone than concrete roofs to damage from weather conditions. Like for example, hail or snow that may cause small cracks in the surface of your tile coating. A common problem when using this type of material outdoors on a regular basis.
Some factors that affect the cost
The factors that affect the cost of tile roof repairs include:
Location
Location of the leak, as well as its size and shape. If a leak is located in an area that needs to be patched or replaced. It will likely be more expensive than if it were in an area that can simply be repaired with a patch or caulk.
Type
The type of tile on your roof. Slate tiles are the most expensive because they’re handmade and require skilled craftsmen to install them properly. Tile pieces vary in price depending on their size and condition as well. Older pieces tend to be cheaper than newer ones because less labor is required to install them.
Size
Size of your roof – Smaller roofs may not need extensive repairs but larger roofs can require more time for repairs due to accessibility challenges like steep pitches or heavy snow loads during winter months.
Condition
Condition of your entire structure: If there are other issues such as damage from water penetration from pipes leaking into insulation layers below floors above decks. This could lead to structural damage. These must also be addressed before any work begins. Plan ahead accordingly by scheduling an inspection first before starting any work. You will know exactly what needs done which will help keep costs down.
If a leak goes untreated for too long, it can cause major damage to your home’s structure and foundation
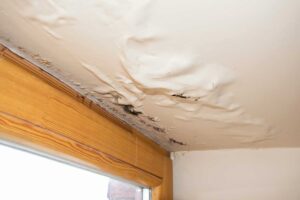
If a leak goes untreated for too long, it can cause major damage to your home’s structure and foundation. As water seeps through the roof, it can cause the wood underlayment or trusses themselves to rot and deteriorate over time. In addition to that, mold and mildew can also begin growing in these areas of your home as well.
If you suspect you have a roof leak, it’s important to get it addressed as soon as possible. The longer you wait, the more damage will be done to your home.
Repairing your tile roof as soon as you detect a problem is a smart move
It’s often difficult to detect a tile roof problem until it is too late. This is because many tiles have a very long lifespan. They will look fine for years after they have been damaged or worn out.
So, if you notice any signs of damage in your tile roof, it’s best to act quickly before the problem gets worse and more expensive to fix. In our next section we will give some DIY tips on how you can try to fix the tile roof yourself.
Tile Roof Repair – How to repair your tile roof yourself
If you have a tile roof, it’s probably made of clay or concrete. If so, you know how expensive they are to replace. But if you catch the problem in time, it’s possible to repair the damage yourself. The individual steps feel like they will be difficult, but they are pretty straightforward
Check for loose tiles
Check for loose tiles. If you find any, remove them. You may want to do this on a ladder or scaffolding so that you can work safely.
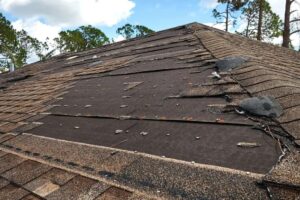
Check for cracked tiles. Cracked tiles can be repaired with a new layer of cement. They must be removed before the new layer is applied.
Check for damaged tiles. Damaged tiles should also be removed before any repairs are made. They could become loose during repairs and fall off the roof if not properly secured in place first.
If you notice any missing pieces of your tile roofing material (which happens quite often), make sure to inspect the underside of the roof carefully before beginning repairs on top – there’s no need to go through all this work just to have some sneaky squirrels steal another few squares of your beautiful roof.
Remove tile
If you’re going to be removing a large amount of tiles, it’s important to remember that you don’t want to scratch or damage the roofing material underneath.
Hammer and chisel
You can use this method on small repairs. Take a hammer and chisel and strike the tile gently but firmly until it breaks off at its base. Then use your hand to pry up any remaining pieces by pulling them upwards towards yourself in a twisting motion.
Safety gloves
This step is optional but recommended if you plan on using this method as hammers can easily slip out of control when striking tiles. Wear safety gloves while hammering away at each broken piece until they’re all removed from your roof
Clean the roof before doing your tile roof repair
If you have a tile roof, you will want to use a power washer to clean the roof. Spray down all areas of the roof with warm water and then brush off any loose material or dirt. You can also use a gentle garden hose if it’s safe to do so; make sure that there’s no standing water left on your tiles after spraying them with water.
When cleaning your tile roof, be sure not to use too much pressure when cleaning with a power washer or using a hose as it could damage your tiles.
Trace the damaged area when doing tile roof repair
Now that you’ve identified the damaged area, it’s time to trace the damage. You will use chalk or marker to draw a line around the damage. Make sure that your line is straight and not crooked, as this will make it easier for you to cut out the damaged area later on.
If there is any damage to the frame, you should also trace that out.
Cut out the damaged roof section
First, you’ll need to use a tile cutter to cut out the damaged section of your tile roof. This can be done by placing a straight edge along the top of one side and pressing down with your hand or hip as you run the tile cutter back and forth across it. If there’s not enough room for you in between the tiles, use a hammer instead to break them apart from their neighbors before sliding them up slightly out of place. This will give you space for gripping when removing and replacing them later.
Once all pieces are removed from around the damaged area, make sure that there’s no debris left behind by brushing any dust or small rocks away with a broom or brush (or even just blowing). Any pieces that remain should be picked up carefully so as not to damage surrounding tiles when they’re put back down into place later on.
Cut the new roofing tile
The first step to replacing your tile roof is to cut the new tiles. You can do this using a power saw or hand saw, depending on your preference and skill level. With either tool, be sure to measure and cut the tiles so they are an exact fit for your rooftop. It’s important that they don’t overlap any existing tiles or protrude too far off of one side of the house or another.
Once you have your new roofing tiles in hand and ready for installation, draw along their edges with chalk so that you have something to guide them by when screwing them into place (if you’re installing yourself). You may also want to use nail guns if that will make it easier for you; just make sure they won’t damage your shingles.
After you’ve traced the damage, you can use an electric saw to cut out the damaged area. Make sure that your saw is sharp and working properly so it will make clean cuts without tearing or ripping into the wood.
If a matching tile is not available, fill it with matching cement or grout
If a matching tile is not available, fill it with matching cement or grout. Use a paintbrush to apply the cement or grout. Be careful not to use too much, or it will drip through the hole and compromise your roofing material.
Make sure you don’t use too little, either—if there’s nothing holding up the tile above it, that section of the roof may end up sitting directly on top of your house’s surface!
Replace the old shingle
Once you’ve removed the damaged shingle, make sure to replace it with another one of similar size and shape. It’s important that you use a level to ensure its straightness before securing it in place with a nail gun.
If you need to replace multiple shingles, check to see if any of them are damaged or rotting before removing them. If they are, cut out the bad areas and replace them with new pieces of wood.
Apply sealant to any new seams that are created by your tile roof repair
While you’re repairing the roof, it’s a good idea to apply sealant to any new seams that are created by your repair. Sealant is important because it acts as the glue that holds your tile roof together, and without it, water can leak inside your home through cracks in the tiles. Also, without sealant, there would be no way to keep your tile roof waterproof. By applying sealant around all of your repairs after they have been made (be sure to let dry for at least 24 hours), you will ensure that your roof remains watertight for years to come!
The individual steps of tile roof repair feel like they will be difficult, but they are pretty straightforward
It’s a bit like assembling furniture—you may have to go back and forth on some parts and reassemble them, but once you’ve got the gist of it, it’s pretty straightforward.
The repair can be done by a DIYer with the right tools and isn’t expensive. The end result adds value to your home in addition to making it safer from leaks or falling shingles.
Call GreenLight Roofing and Remodeling for your tile roof repair
Replacing a tile roof is a big job and it can be overwhelming to think about. However, with the right tools and some basic knowledge, you can tackle this project on your own. Remember that it is better to take your time and do everything right than rush through the repair and risk making things worse in the long run.
If you are not confident about doing this yourself it is always best that you call the professionals. It will cost less in the long run to have the experts handle this. Doing something yourself could lead to a waste of materials and further damage down the road.
We hope you’ve found our guide to tile roof repairs helpful. If you’re not sure if your roof needs a repair or if you need maintenance, make sure to contact us today at (817) 663-1860. We will be happy to answer whatever questions you may have and get started on your tile roof repair in Fort Worth TX as soon as possible.


