When it comes to keeping your home dry and damage-free, the unsung hero is often the roof flashing. This essential component acts as a guard, channeling water away from critical areas of your roof and into the gutters. If you're looking to ensure your roof stands the test of time against the elements, understanding and installing proper roof flashing is key. Roof flashing is your first line of defense against water infiltration, where the roof meets a vertical surface like a wall or chimney. Without it, your home could be vulnerable to leaks, mold, and a host of other moisture-related issues.
Understanding Roof Flashing
Before diving into the nuts and bolts of flashing installation, it's crucial to grasp what roof flashing is and why it's so important. This section will illuminate the role of flashing in roofing systems, the different materials used, and the various types of flashing that protect your home.
What is Roof Flashing?
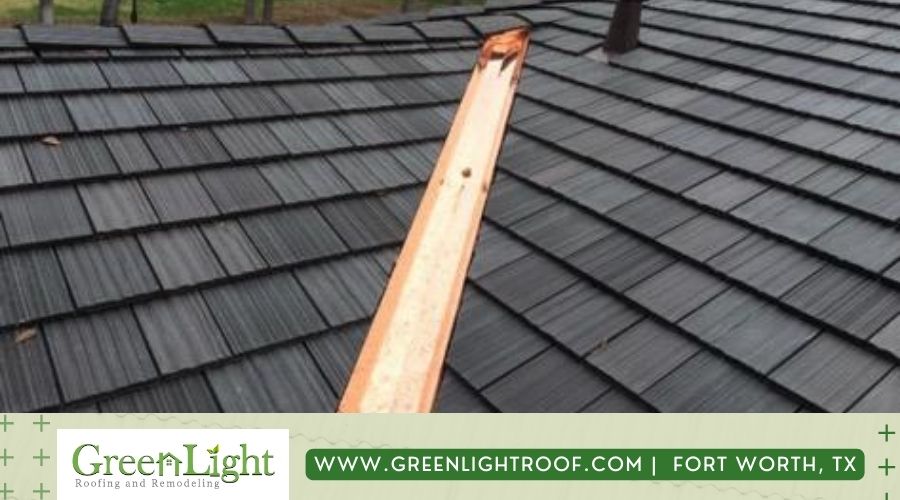
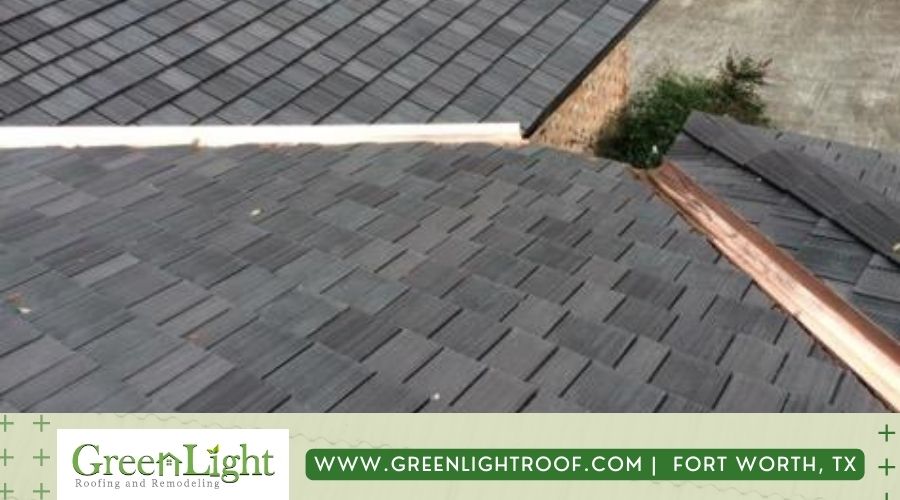
Flashing is the waterproofing backbone of any roofing system. It's the thin material—usually metal—that roofers install to direct water away from areas prone to leaks, like joints and valleys. Whether you're dealing with a metal roof, shingles, or tiles, flashing is the detail that bridges the gap between roofing materials and other parts of the house structure, such as chimneys, vents, and dormers.
The Role of Flashing in Roofing Systems
The primary role of flashing is to serve as a sealant for the joints on your roof, which are the most vulnerable points for water to seep through. Without flashing, water can easily penetrate these joints, leading to costly damage inside your home. By effectively channeling water away, flashing maintains the integrity of your roof and the safety of your home.
Types of Roof Flashing Materials
There are several types of flashing, each designed for specific parts of your roof. Metal flashing, for instance, is durable and commonly used because of its longevity and resistance to the elements. Rubber and plastic options are also available, offering flexibility and a snug fit for complex roof shapes. Composite materials are a newer entry in the market, combining the benefits of traditional materials with advanced technology for enhanced performance.
Installation and Maintenance
Proper installation and regular roof maintenance are key to ensuring that your roof flashing perform its protective role effectively. This section will guide you through the installation process and provide tips for maintaining your flashing over time.
How to Install Roof Flashing: A Step-by-Step Guide
Installing roof flashing doesn't have to be daunting. With the right tools and a bit of patience, you can ensure your roof is equipped to handle whatever nature throws its way. Here's how to do it step by step:
- Measure and Cut the Flashing: Begin by measuring the area where the flashing is to be installed. For accuracy, measure twice before cutting. Once you have your measurements, cut your metal, rubber, or plastic flashing to fit. Metal flashing may require tin snips for cutting, while rubber and plastic can often be cut with a sharp utility knife.
- Fit the Flashing: Dry fit your flashing pieces to ensure they cover the necessary areas completely. For areas around chimneys or vents, you may need to shape the flashing to conform to the contours of these structures. It's crucial that the flashing extends far enough to divert water effectively.
- Secure the Flashing: Attach the flashing using roofing nails or a suitable sealant. When using nails, make sure they're long enough to penetrate the roofing material and sheath beneath. If you're using a sealant, apply it in a continuous bead and press the flashing firmly into place.
- Ensure Proper Overlap: Flashings should overlap each other by at least 2 inches to create a watertight barrier. Start from the bottom and work your way up, so the top pieces overlap the bottom ones. This ensures that water flows over the joints rather than into them.
- Seal the Edges: Once all pieces are in place, apply a bead of roofing sealant along the edges of the flashing. This extra step helps to lock out water and secure the flashing against wind uplift.
- Inspect Your Work: After installation, take a moment to inspect your work. Make sure every piece is secure and that there are no gaps where water could enter. A good installation means peace of mind during the next rainstorm.
Maintaining Your Roof Flashing
Once installed, your roof flashing requires regular maintenance to continue protecting your home effectively. This includes inspecting the flashing periodically for signs of damage, such as rust on metal flashing or cracks in rubber or plastic materials. Cleaning debris from the flashing area also helps prevent blockages that could cause water to pool and seep through the roof. If you find any issues during the inspection, prompt roof repair is essential to prevent minor damage from becoming a major problem.
Advanced Tips and Techniques
With the basics covered, it's time to delve into more advanced tips and techniques for those trickier aspects of roof flashing. This section will explore how to handle complex roof structures and stay updated with the latest materials and methods.
Flashing for Complex Roof Structures
Complex roofs with multiple valleys, dormers, or skylights need extra care when installing flashing. Here's how to approach these challenges:
- Identify Complex Areas: Start by identifying all the areas that require specialized flashing. Look for places where the roof intersects with vertical structures or where multiple roof lines meet.
- Custom Fit Your Materials: For each unique area, you may need to custom-bend or cut your flashing to ensure a perfect fit. Use a template if necessary to replicate complex angles or curves.
- Double Check Your Seals: After installation, double-check that all seals are tight and there are no gaps. Use sealant where necessary to reinforce the flashing.
Innovative Flashing Materials and Methods
The roofing industry is always innovating, as are the materials and methods for flashing. To stay ahead:
- Research New Materials: Keep up-to-date with the latest materials that offer better durability or easier installation. Consider options like self-adhesive flashing for a quick and secure bond.
- Follow Modern Techniques: Learn about new installation techniques that can save time and improve the effectiveness of your flashing. For example, liquid flashing can be applied in areas where traditional methods are challenging.
Professional vs. DIY Flashing Installation
While installing flashing is within the reach of many DIY enthusiasts, it's important to weigh the complexity of the job against your skills and experience. Professional roofers bring a wealth of knowledge, including how to handle unexpected issues that often arise during installation. They also have the right tools and materials at their disposal, which can make a significant difference in the quality and longevity of the job. If you're not confident in your ability to install flashing correctly, or if the job involves complex roof structures, it's wise to invest in professional services.
How to Install Step Flashing With a Wall Corner
When your roof meets a wall, step flashing is essential to prevent water from seeping into the joint. This section will walk you through the process of installing step flashing at a wall corner, ensuring a watertight seal.
Step-by-Step Guide
Step flashing is a series of individual metal pieces that are layered with shingle courses to ensure water flows away from the wall. Here's how to install it:
- Prepare the Area: Clear any debris and old flashing from the area where the wall meets the roof.
- Measure and Cut Flashing: Measure the length of the wall corner and cut your step flashing pieces to fit each step of the shingles.
- Position the Flashing: Slide the first piece of step flashing under the shingle so that it covers the end of the shingle and rests against the wall.
- Secure the Flashing: Nail the flashing to the roof but not the wall. This allows for expansion and contraction due to temperature changes.
- Overlap Flashing Pieces: Place the next piece of flashing so it overlaps the first by at least 2 inches and continue this process along the wall corner.
- Apply Sealant: Once all pieces are in place, apply a bead of roofing sealant along the edges where the flashing meets the wall to ensure a watertight seal.
How to Install Step Flashing Where There Is No Wall Corner
In situations where your roof's edge meets a vertical surface without a defined corner, step flashing is still a critical component. This section will guide you through the installation process to ensure complete coverage.
Step-by-Step Guide
- Prepare the Roof Edge: Clean the area along the roof edge where the flashing will be installed.
- Cut and Bend Flashing: Cut the flashing to the required length and bend it 90 degrees down the middle.
- Install the Flashing: Slide the flashing under the shingles, ensuring it extends over the roof edge.
- Nail in Place: Secure the flashing to the roof, making sure not to nail through the shingle.
- Seal the Edges: Apply roofing sealant along the top edge of the flashing for added protection against water penetration.
How to Install Counter-Flashing on a Chimney
Counter-flashing is an additional layer of protection used in conjunction with base flashing around chimneys or other vertical structures. This section will explain how to install counter-flashing to create a dual barrier against water intrusion.
Step-by-Step Guide
Counter-flashing involves embedding a piece of metal into the chimney mortar joints to cover the top of the base flashing:
- Cut into Mortar: Use a grinder to cut a small groove into the mortar joint above the chimney flashing.
- Measure and Cut Counter-Flashing: Measure the chimney's perimeter and cut the counter-flashing to fit.
- Insert Counter-Flashing: Insert the counter-flashing into the groove in the mortar.
- Seal the Groove: Use a high-quality sealant to seal the groove with the counter-flashing in place.
- Secure the Counter-Flashing: Fasten the counter-flashing to the chimney, not the roof, to allow for movement.
How to Install a Roof Plumbing Vent Flashing Boot
Plumbing vents protruding through your roof require a special type of flashing known as a boot. This section will detail the steps to install a vent flashing boot, ensuring a snug and secure fit.
Step-by-Step Guide
A vent flashing boot is designed to fit around the circular pipe of a plumbing vent:
- Remove Shingles Around Vent: Carefully remove the shingles around the plumbing vent.
- Slide Flashing Over Vent: Place the vent flashing boot over the plumbing vent, sliding it down to the roof.
- Secure the Flashing: Nail the flashing boot to the roof, ensuring it's snug against the vent.
- Replace Shingles: Reinstall the shingles around the vent, trimming as necessary to fit around the flashing.
- Seal with Caulk: Apply a bead of caulk around the base of the vent where it meets the flashing for a watertight seal.
When to Repair a Roof Flashing Leak
Knowing when to address a roof flashing leak is crucial for maintaining the integrity of your home. Regular inspections, especially after severe weather events, can help you catch and address issues early. If you notice any signs of damage, such as rust, cracks, or areas where the flashing has come loose, it's time to take action. Delaying repairs can lead to more extensive damage, not just to the roof but also to the interior of your home.
How to Repair Your Roof Flashing
Even with the best installation, roof flashing can require repairs over time due to weather exposure or other factors. This section will provide a guide to assessing and repairing your roof flashing.
Step-by-Step Guide
If you find damage, here's how to repair your roof flashing:
- Assess the Damage: Determine the extent of the damage to the flashing.
- Remove Damaged Flashing: Carefully remove any nails or sealant and take out the damaged flashing.
- Cut New Flashing: Measure and cut a new piece of flashing to fit the area.
- Install New Flashing: Fit the new flashing into place, secure it, and apply sealant around the edges.
- Test for Leaks: After repairs, check for leaks by simulating rain with a hose or waiting for a rainy day.
Protect Your Home with GreenLight Roofing and Remodeling
When it comes to safeguarding your home from the unpredictable Texas weather, the integrity of your roof flashing cannot be overstated. It's the shield that stands between your cozy interiors and the harsh elements outside. Whether you're dealing with the aftermath of a storm or looking to preemptively secure your roof, understanding when and how to repair roof flashing is crucial.
If you're noticing signs of wear or if a leak has made an unwelcome appearance, it's time to take action. While some minor repairs can be a DIY project, for comprehensive solutions and peace of mind, professional expertise is often the best route. That's where GreenLight Roofing and Remodeling comes in. Located in the heart of Fort Worth, TX, our team of seasoned professional roofers is equipped to handle all your roofing needs.
Frequently Asked Questions
What is the lifespan of roof flashing?
The lifespan of roof flashing depends on the material and environmental conditions but typically ranges from 15 to 30 years.
Can I paint over the roof flashing?
Yes, you can paint over metal roof flashing with a paint that's formulated for use on metal surfaces.
How do I know if my flashing needs to be replaced?
Signs that your flashing may need to be replaced include visible rust, cracks, or if it's pulling away from the roof or wall.
Can roof flashing be repaired without replacing it?
Minor issues with roof flashing can often be repaired with sealant or by patching without needing a full replacement.
Is it necessary to remove shingles to replace flashing?
In many cases, shingles will need to be removed to replace flashing properly, but it depends on the location and extent of the repair.
Don't let a small leak turn into a big problem. Contact GreenLight Roofing and Remodeling today at (817) 263-6088 and let us fortify your home against the elements.
Recent Posts
-

How Slate Roof Tiles Add Value And Curb Appeal
Jul 31, 2023 -

Tile Roof Repair In Grandview, TX
Feb 07, 2023 -

Emergency Roof Repair in Keene, TX
Feb 07, 2023 -

Window Replacement In Alvarado, TX
Jan 09, 2023 -

Best Roofing Companies, ALVARADO, TX
Jan 03, 2023
Categories
Tags
- Counter-flashing
- DIY Flashing Installation
- Flashing for Complex Roof Structures
- Flashing in Roofing Systems
- flashing installation
- Innovative Flashing Materials
- Install a Roof Plumbing Vent Flashing Boot
- Install Counter-Flashing
- Install Roof Flashing
- Install Step Flashing Where There Is No Wall Corner
- Install Step Flashing With a Wall Corner
- installing proper roof flashing
- Installing roof flashing
- lifespan of roof flashing
- Maintaining Your Roof Flashing
- Repair a Roof Flashing Leak
- Repair Your Roof Flashing
- repairing your roof flashing
- roof flashing
- Roof Flashing Materials
- self-adhesive flashing
- type of flashing
- types of flashing
- vent flashing boot